In the first part of our article series, we had an overview of the vSphere Replication inner workings and studied several typical implementation designs. In this second part we will deploy the vSphere Replication Appliance on two sites: the production site and the disaster recovery site.
You can certainly remember that each appliance comes with a management part and the vSphere Replication engine itself. In our scenario, only the disaster recovery site requires the two components, and the production site would be happy with the management server only. However, both components are bundled together in the appliance, therefore there will be no difference in the deployment procedure for each site. Let’s proceed!
Preparation
There are a few things to prepare before we start:
- Choose a name for each appliance.
- Define IP addresses.
- Create DNS records for the appliance’s names.
- Download the sources (choose the .zip version and extract the archive to get the .ovf file).
Deployment
Let’s start from the web client, in the Hosts and clusters view. Right-click any object (datacenter, cluster, host…) and select Deploy OVH Template…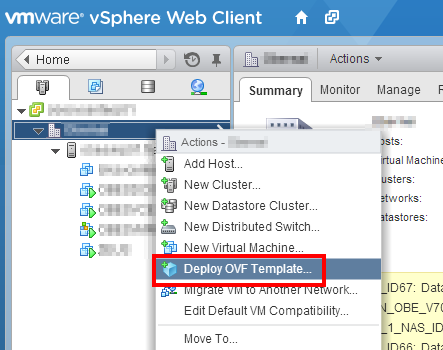 Allow access!
 Select Local file and go get the downloaded .ovf file.
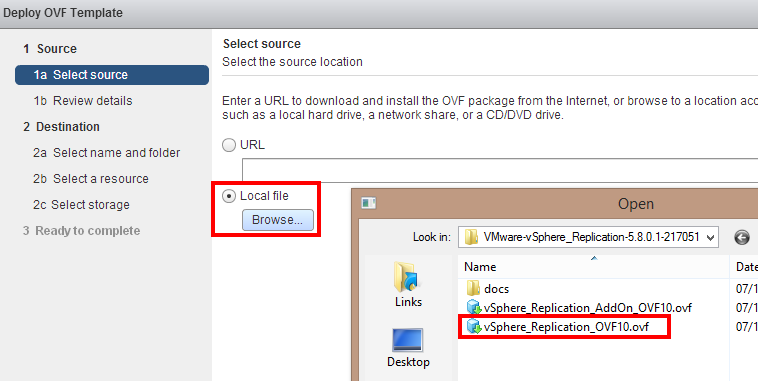 Check the information.
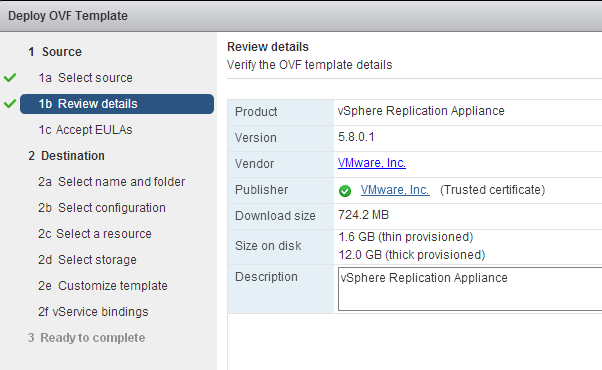 Accept the EULA, then rename the appliance and put it in the appropriate datacenter. Here we are going to start with our disaster recovery datacenter, which has a single host.
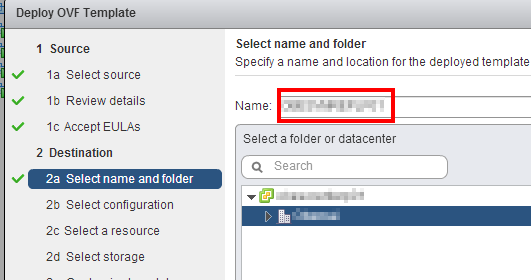 We can leave 4 CPUs as we are on the disaster recovery site, as it needs to run the vSphere Replication Management Server and the vSphere Replication Server roles.
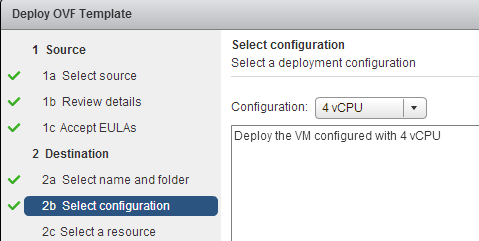 Select a host to run the appliance.
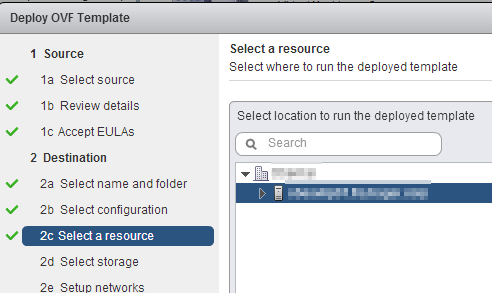 Select a datastore for the appliance. We will choose the local datastore of the ESXi server, which is our disaster recovery datastore.
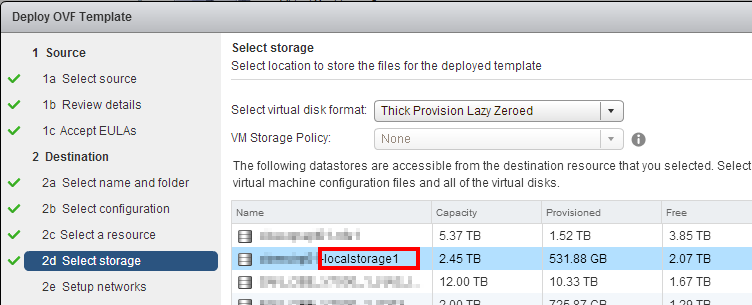 Configure the network. Static adressing is recommended (you should have reserved an IP address earlier).
You can configure several DNS servers by separating them with a comma.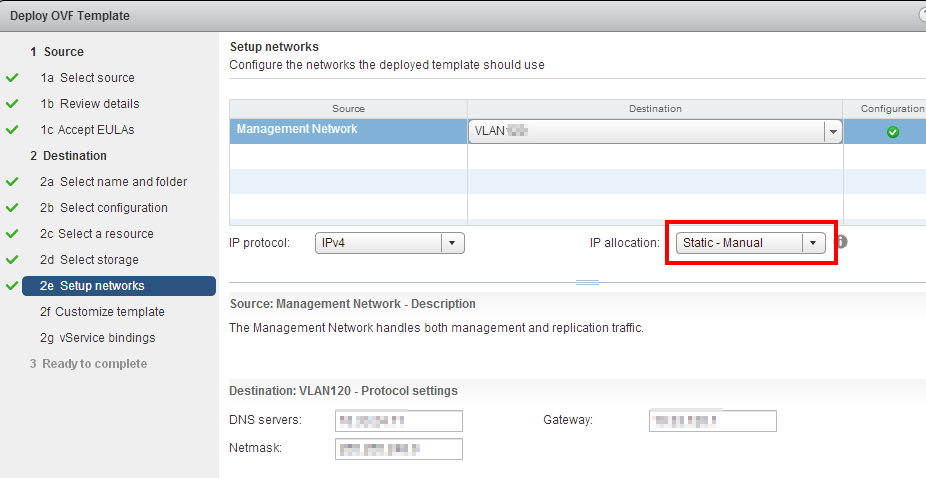 Enter the IP address now, and configure a root password for the appliance. Keep the box checked for using the internal database.
 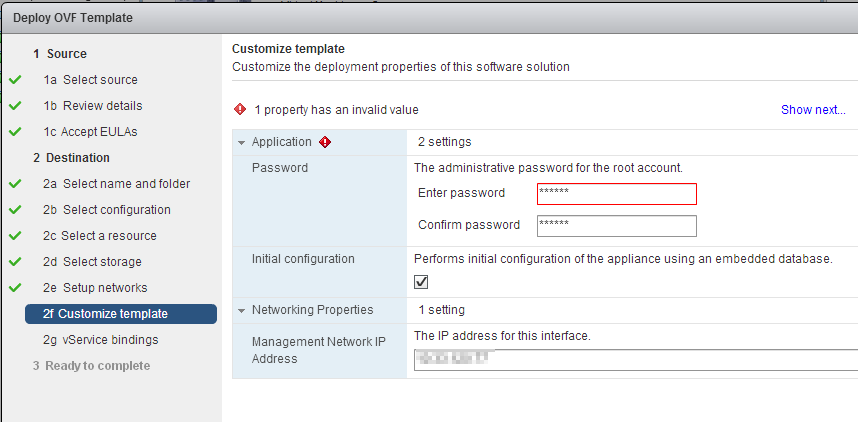 Accept the warning.
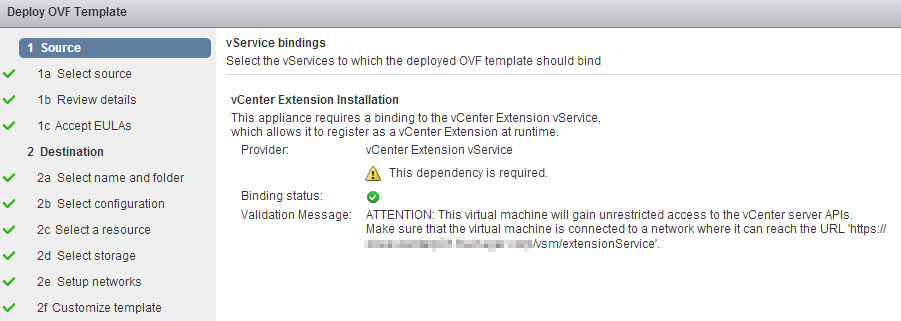 Finally, check your settings and start the deployment!
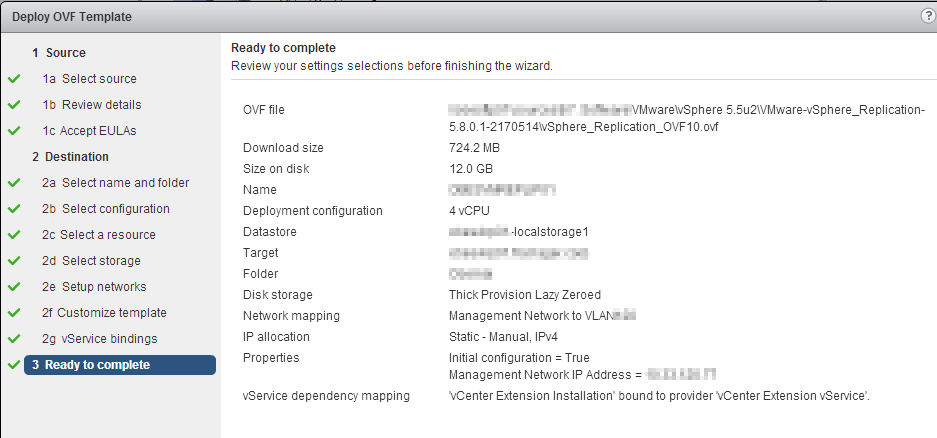 A few minutes later the appliance starts and you can access the management console at https://my-appliance:5480.
Let’s follow the same procedure again for the second appliance on the other site. Once done, our two appliances are ready!
In the next article we are going to configure a few settings on our new appliances and update the self-signed certificates with CA-signed certificates (this is optional). Then, we will connect both appliances together!