In Part 2, we left our vCSA in a running state, technically ready for managing ESXi servers in production. In a small environment or a test lab, we could stop there. But for an appliance that is going to manage a production virtual infrastructure, we could improve our setup a little bit.
In this article, we are going to configure an SMTP server and implement monitoring for the appliance’s database disk.
Configure an SMTP server
Whether it is for the custom disk monitoring in the next part of this article or just for sending emails for standard vCenter Server alarms, it is necessary configure an SMTP server for the appliance. The configuration is easy.
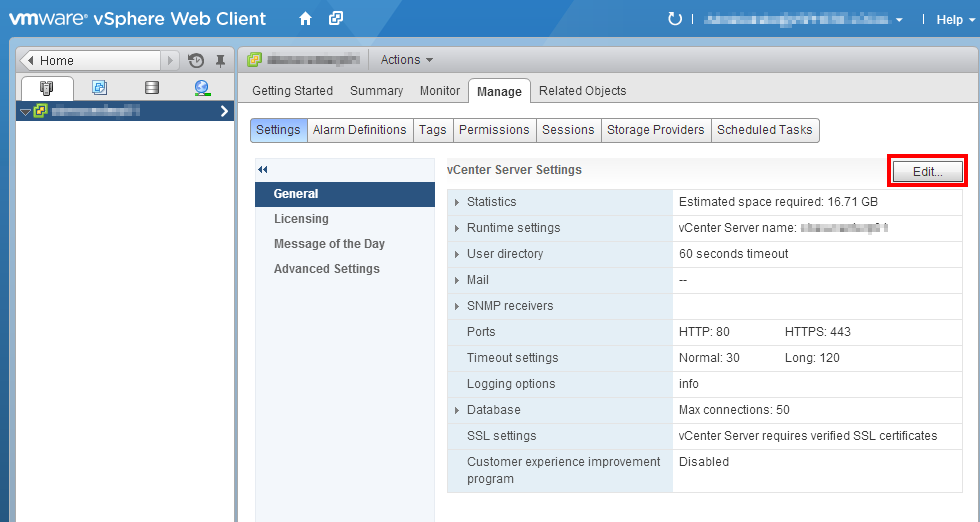
Connect to the web client (https://my-vcsa:9443/vsphere-client) with an administrator account, go to Hosts and Clusters, make sure you select the vCenter server on the left, select the Manage tab and click Settings, General. Finally, click Edit.
 Then simply enter the FQDN (or IP address) of your internal SMTP server and the sender address you wish to use. vCenter Server does not support SMTP authentication, so you may have to configure something on your mail server!
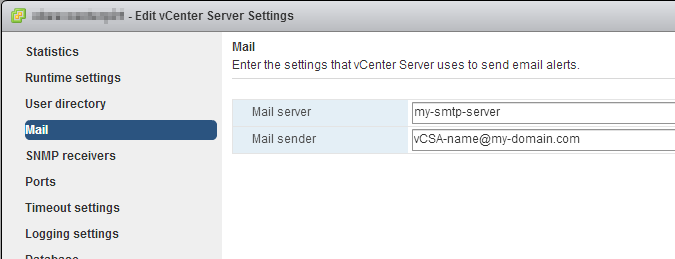 Click OK when you’re finished: the appliance is ready to spam 🙂
Monitoring the appliance’s disk space
Most applicative issues of the appliance will come up in the web client as errors or warnings. But there is one critical thing that you will not be made aware of: it’s when the appliance runs out of disk space.
Normally, the appliance has been sized to avoid problems, but if you change the statistics intervals, or if your systems generate excessive amounts of logs, you might fill the data disk and encounter serious issues. VMware provides simple steps to implement a basic disk monitoring system, based on the appliance’s scheduler: cron. The idea is to schedule a script to run daily (or weekly) on the appliance, which will send you an email when disk space reaches a defined threshold. Let’s implement that!
Download the script and customize it
First, download the script template provided by VMware (the “mon_disk” file at the end of the kb). Extract the zip file to access the shell script inside it. Do not open the file with the Windows Notepad! It’s unix/linux formatted and will not display correctly. Notepad++ is a good choice.
You must at least change the line 4 (email =) and set your email address there. You can also customize the threshold but I find 80% is a good value.
I also like to adapt the email formatting a little bit by providing clearer information, especially regarding the sender name. I also add the vCSA name in order to identify clearly where the message comes from; handy if you manage several vCSAs! At the end, you should have something similar to this:
#!/bin/bash

# Please provide email for alert messages
email='my-email-recipient@mycompany.com'
# Please provide percentage threshold for PostgreSQL used disk space
thresh=80

# check that we're using PostgreSQL database
db_type=`cat /etc/odbc.ini | grep DB_TYPE | awk -F= '{print $2}' | tr -d ' '`
if [ "$db_type" != "PostgreSQL" ]; then
   exit
fi

if [ -z "$email" ]; then
   if [ ! -f /etc/vmware-vpx/root.email ]; then
      exit
   fi
   email=$(head -n 1 /etc/vmware-vpx/root.email)
fi
# identify PostgreSQL mount point
mount_point=`cat /etc/vmware-vpx/embedded_db.cfg | grep EMB_DB_STORAGE | awk -F"'" '{print $2}'`
# collect disk usage for the mount point
df_out=`df $mount_point | tail -n 1 | awk '{print strtonum($5)}'`

if [ $df_out -gt $thresh ]; then
   cat << HEREDOC | sendmail -t
To: $email
Subject: Storage Alert for MyvCSA - disk full!
From: vCenter Server Appliance disk usage <myvCSA_noreply@mycompany.com>

Hello!

Threshold of $thresh% for $mount_point is exceeded: $df_out%.
Consider extending your disk storage for $mount_point mount. Please refer to http://kb.vmware.com/kb/2056764 how to do that.

Regards,
my-vCSA's-name
HEREDOC
fi
When you’ve finished customizing the script, save it and upload it to your vCSA. The easiest way to do this is by using WinSCP!
Upload the script
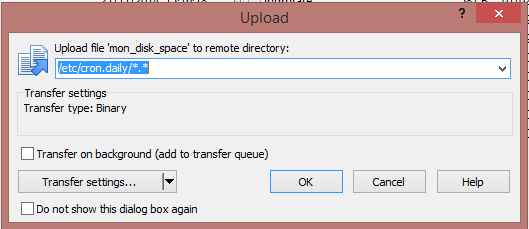
With WinSCP, connect to the appliance with the SCP protocol (use the root account and your customized root password). The right pane is the appliance; browse to /etc/cron.daily (or /etc/cron.weekly if you prefer a weekly execution). The left pane is your machine. Browse to the folder where you customized the mon_disk_space script.
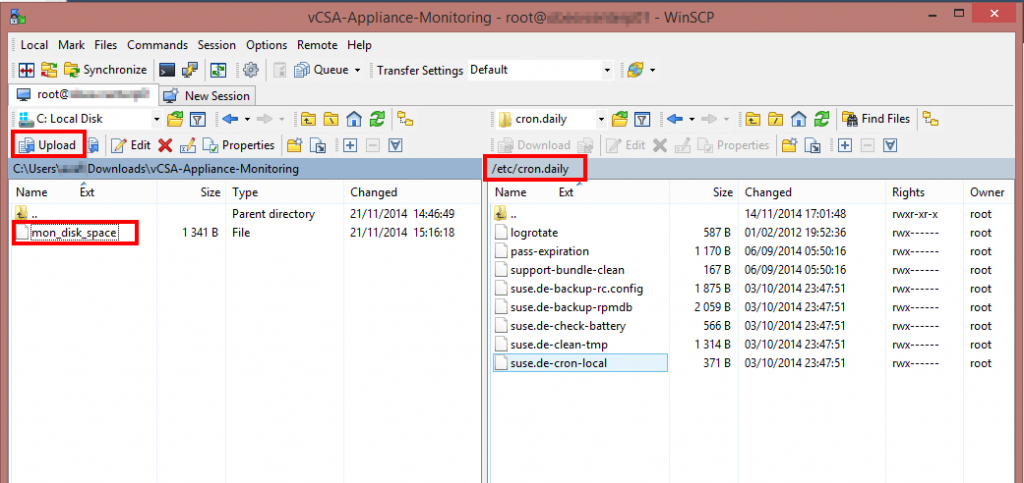 Click on Upload to send the script file to the appliance.
Then we need to change the permissions of the script on the appliance, else it won’t be executable. Right-click mon_disk_space, Properties, and click the X checkbox for the Owner line.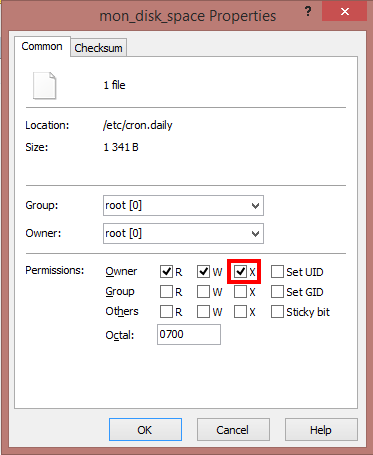 The script is in place. If you want to check that everything works, you can create a test monitoring script with a thresh=0 value (line 6), and copy that script to the cron.hourly folder as we just did. Then wait until the next execution: you should receive an email.
If you happen to fill the disk of your appliance, VMware provides a procedure to extend the disk here.
Now that our disk space is under control, let’s work on implementing custom certificates!
