In the previous article we deployed the vCenter Server Appliance and made a basic setup. In this article, we will go a step further and cover the licensing and authentication for your new vCSA
Let’s start by accessing your vCenter Appliance at https://myvcenter:9443/vsphere-client. Use administrator@vsphere.local to connect with the password that you specified during the setup wizard.
Licensing
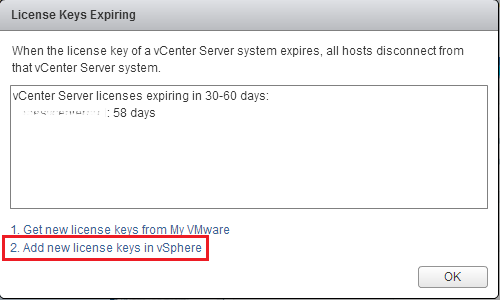
You’ve not even started that the license is already expiring!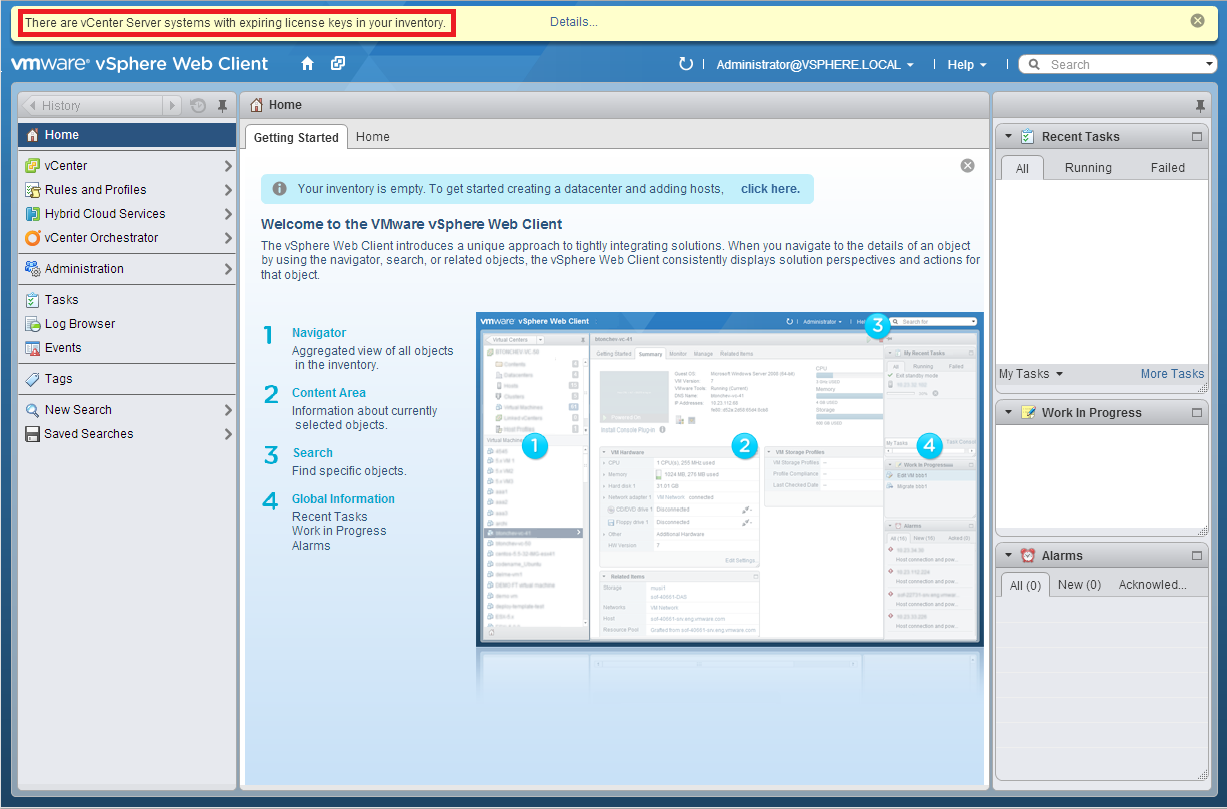 Unless you want to stay in evaluation mode, let’s fix this immediately. Click on Details in the yellow warning bar, then choose Add new license keys in vSphere.
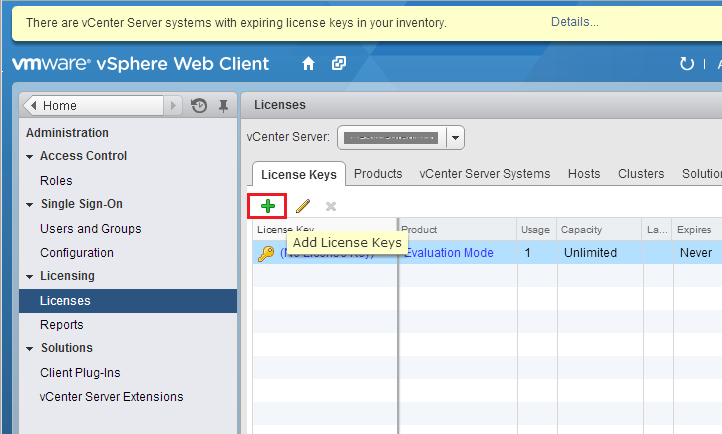
 This will take you to the license management of the vCenter. Click the green Plus sign to add your license.
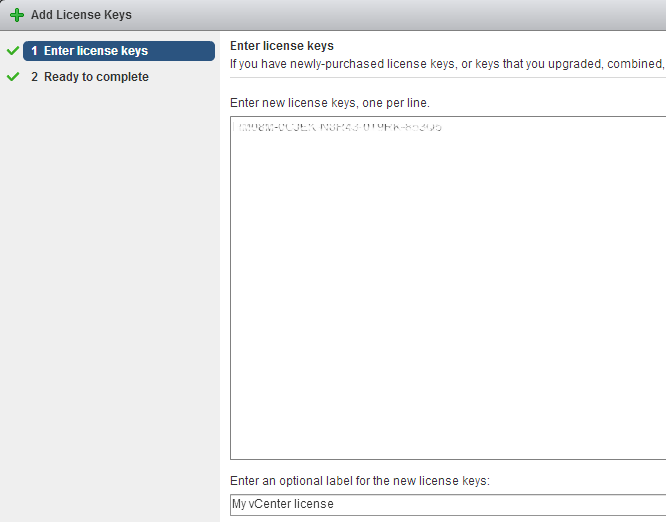
 Type your vCenter license key and optionally, provide a label for easy identification.
 Review your license key, then click Finish to add the new license. The new license now appears in the management panel, but we must still assign it to our newly installed vCenter Server. Click on vCenter Server Systems.
 You will see your vCenter Server. Click on Assign License Key…
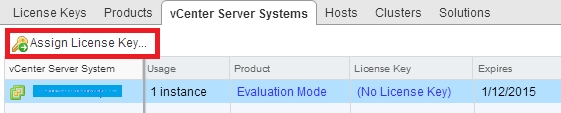 Finally, select your license key and click OK.
 Your product is now licensed! Next focus is on password policies.
Password policy
You surely have a password policy. But with a maximum password lifetime of 90 days? Probably not 🙂 Let’s change this to a more realistic setting, which I’ll leave up to you (I’ll go with one year). There are two realms where password policies apply: the vCenter realm, and the appliance realm. Let’s start with the appliance.
Appliance password policy and root password update
To change the password policy for the appliance, log in to https://my-vcenter:5480 with the root account. For the moment its password is still “vmware”, but it’s time to change this too!
Once logged in, go to the Admin tab. Change the password to something more secure and change the password validity value to something that fits your password policy. If you wish, provide an email address where to send a warning before expiration (we will configure smtp in part 3, but you can already provide the email address).
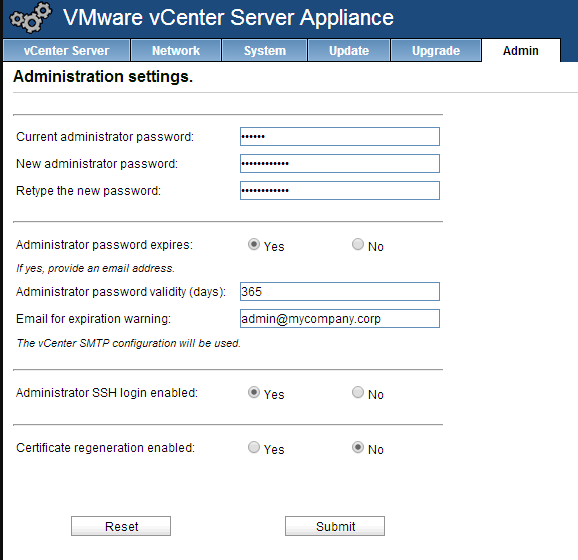 Submit and you’re done. You can logout the appliance.
vCenter password policy
If you’re still connected to the vSphere Web Client it’s perfect; if not log in again to https://my-vcenter:9443/vsphere-client as administrator@vsphere.local, click on Administration, then go to Single Sign-On, Configuration. Then, click the Edit… button.
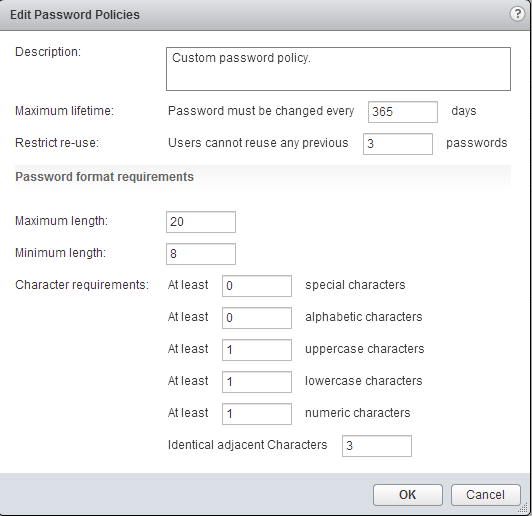
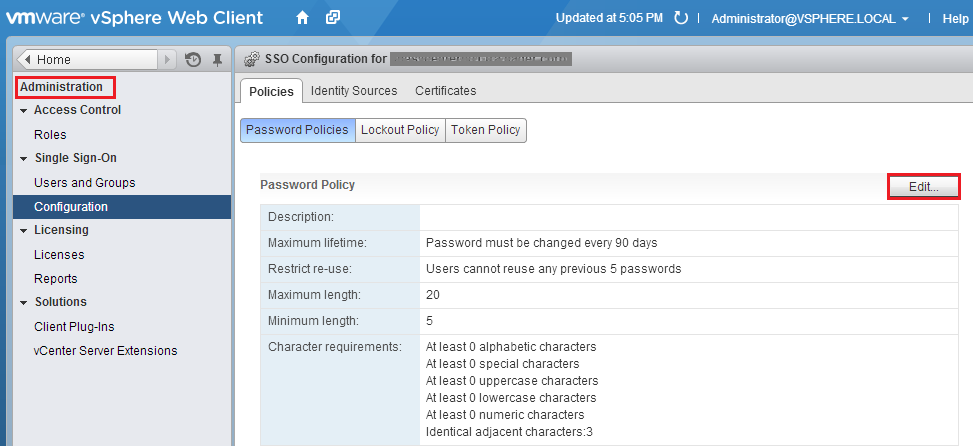 Change the settings to something that fits your policy, then click OK.
 We have customized the password policy for both the appliance and the vCenter. We will now focus on the configuration of the authentication.
Authentication configuration
It’s now time to configure who can access our new vCenter Server. In most companies the main identity source will be Active Directory, so let’s focus on this option.
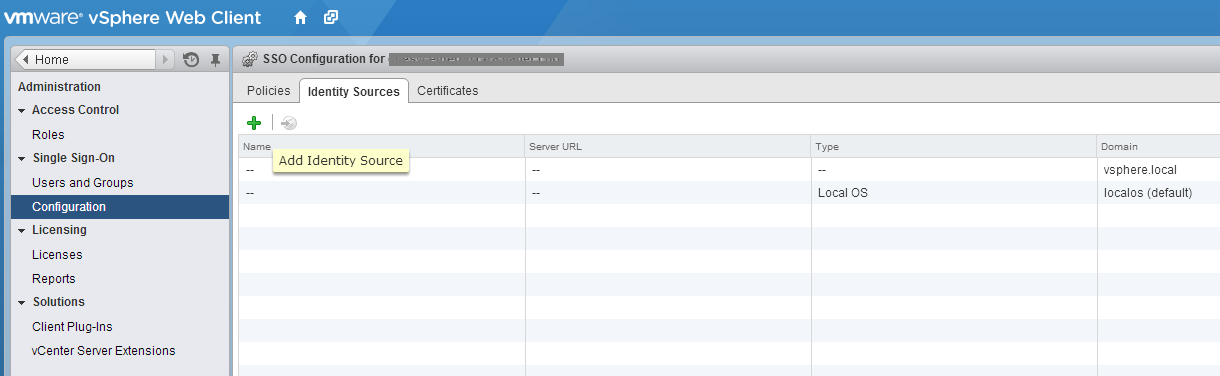
You still need to be logged in as administrator@vsphere.local to the vSphere Web Client (https://myvcenter:9443/sphere-client). Go to Administration, Single Sign-On, Configuration, and select the Identity Sources tab. We are going to add a new Identity Source by clicking the green Plus sign.
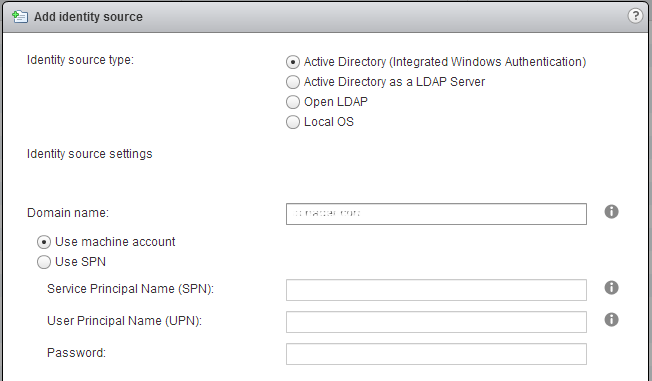
 If you have added your appliance to AD, it’s time to enjoy the next step! The setup of AD as an identity souce is going to be easy. Just select Active Directory (Integrated Windows Authentication), check the domain name (already populated) and leave the “Use machine account” option. And click OK. That’s all!
 The new identity source appears in the list.
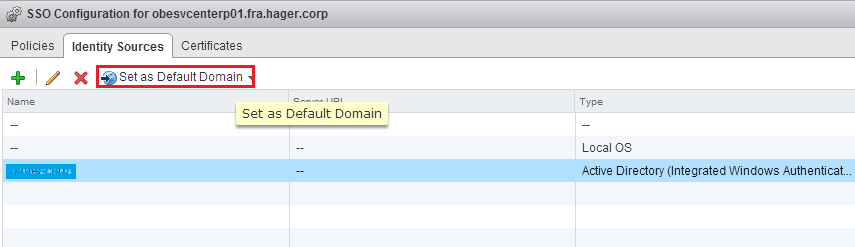
 Now, select your identity source and click Set as Default Domain in order to make your AD the default identity source, which is probably what you wish to have.
 One remark here: if your domain name was in the form “subdomain.domain.suffix”, it will be added as an identity source in the form of “domain.suffix”. Of course, this will not prevent you to log in with your AD account later on, but you will have to prefix your login with your subdomain name (e.g. subdomain\username).
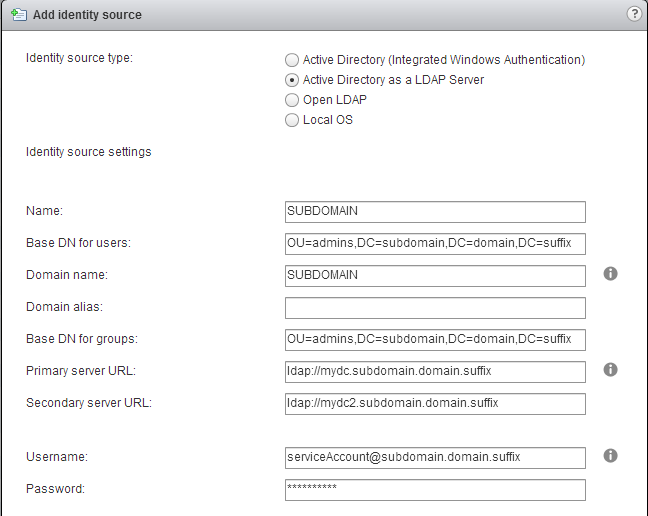
Second remark: if, for some reason, you did not want to add the appliance to the domain, you can still configure AD as an identity source by choosing the option “Active Directory as a LDAP Server”. The configuration screen would look like that:
 In any case, one of the benefits of using the “Integrated Windows Authentication” is that you will have a much faster lookups when adding groups and users. And you don’t need to setup a service account to connect to AD!
OK, with all that done we are still nowhere, as we did not grant any permission to AD groups or users. This is the next step!
Delegate permissions to the vCenter Server
SSO permissions
Let’s first clear up a possible confusion. You could be tempted to give permissions in Administration, Single-Sign-On, Users and groups. But this would grant permissions to the SSO component of vCenter only, not to the vCenter Server itself. In other words, if you make your AD account member of the administrators group here…
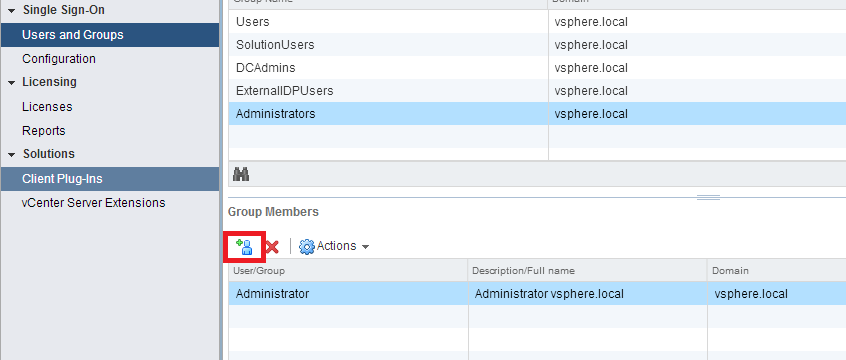
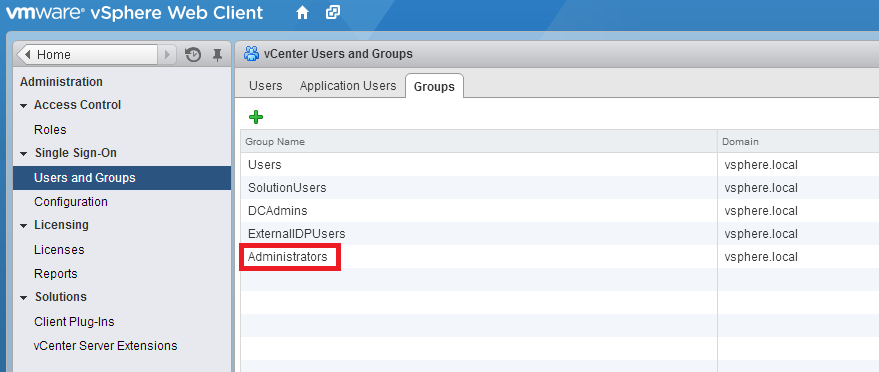 … you will just be an SSO admin, and nothing else! If this is what you want (and there are use cases for that), just select the Administrators Groups, and add users or groups by clicking on the small User icon at the bottom.
 Choose your domain in the drop-down menu and look for the user or group you want to include to the SSO Administrators group.
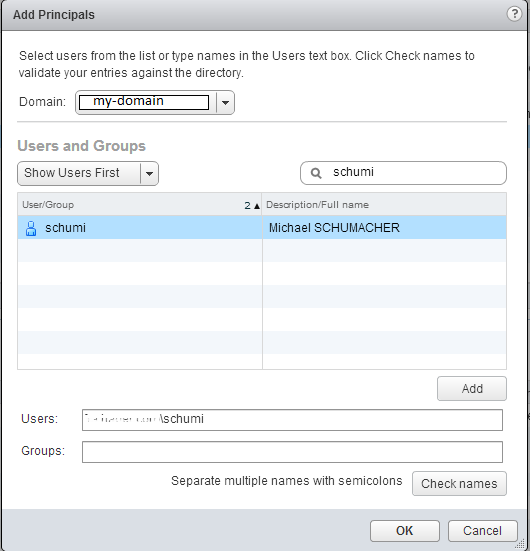 The new SSO admin appears in the list.
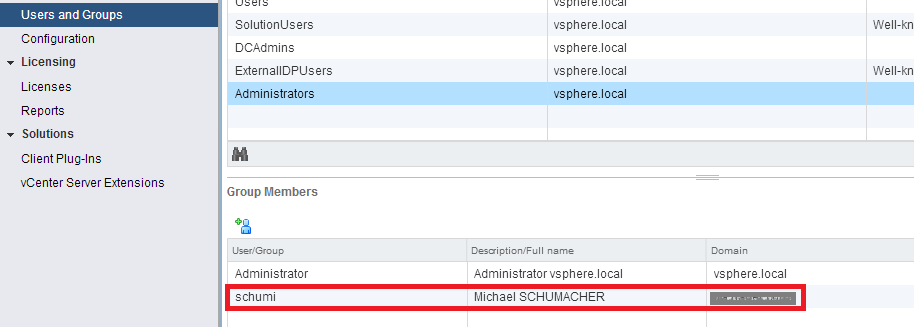 But what you probably want is to delegate permissions to your vCenter Server itself. Let’s do that!
vCenter permissions
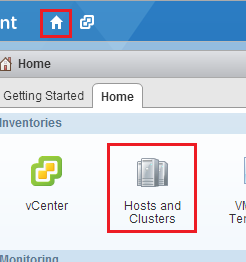
The fastest way is to click the small home shortcut at the top, then select Host and Clusters.
 Your Hosts and Clusters view will look quite empty but that’s ok for the moment. Go to the Manage tab, click Permissions, and finally click on the green Plus sign.
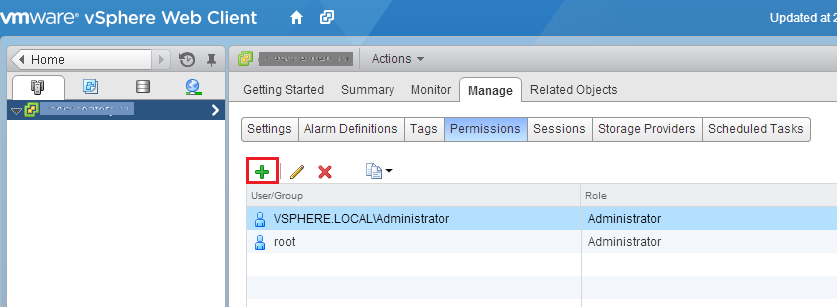 Notice the two pre-existing accounts which are given permissions to our vCenter too (this is why you can be where you are now). But let’s add our AD user (or preferably, AD group) by clicking the Add… button at the bottom. In the popup windows, choose your domain and find the appropriate user or group. Click OK.
 Then select the Administrators group from the drop-down menu, and click OK.
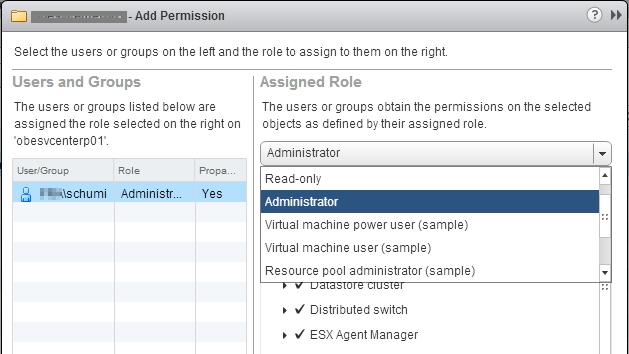 Done!
Done!
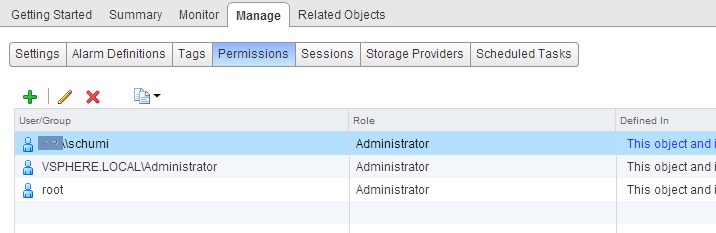 Repeat this procedure for as many users or groups as you need. Of course, you may have to create specific roles to suit your requirements (click Home, Roles, to create custom roles).
Recap
Our appliance is now ready for production. It has proper licensing and we have configured a password policy, changed the root password and authorized AD users and groups. You could go ahead and add ESXi hosts now!
But we could also go a little bit further: in the next part we will configure and SMTP server implement monitoring for the appliance’s remaining disk space!