In part 4, we configured replications and learned to monitor them. Now it’s time to test a virtual machine recovery!
We will connect to the disaster recovery vCenter and recover a replicated virtual machine. After the recovery test, we will reconfigure the replication by using the existing virtual machine files at destination. This will avoid a new, complete initial replication by replicating only changed blocks.
Recovering a virtual machine
Let’s connect to the disaster recovery vCenter and go to the vSphere Replication plugin, then Monitor, Incoming replications. Then right-click the virtual machine to recover and choose Recovery…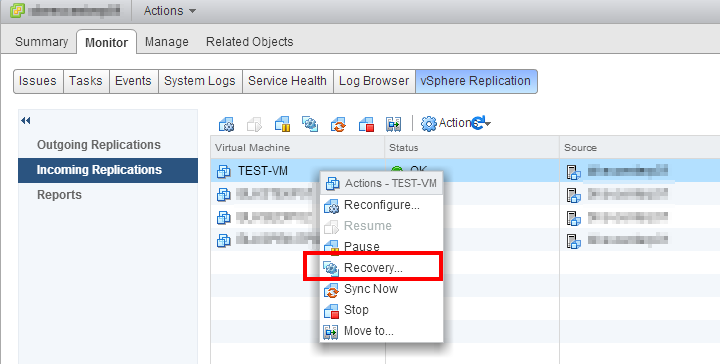 There are two possibilities:
- Synchronize recent changes: this allows you to start the recovered VM with the very latest data available on the source VM. This seems nice, but there are constraints:
- The production machine must be available: this is unlikely in a real disaster recovery scenario. Therefore, it’s probably safer to test in realistic conditions (source VM unavailable).
- The production machine must be stopped: this will obviously be a problem if you test the recovery during working hours.
- Use latest available data: in this case the VM is recovered on the basis of the last successful synchronization. This is probably what you would use in the case of a real disaster.
The first option is especially interesting in a planned outage scenario, like an long electrical maintenance or a site relocation. But in the case of a disaster the second option is the way to go, and this is what we are going to test now.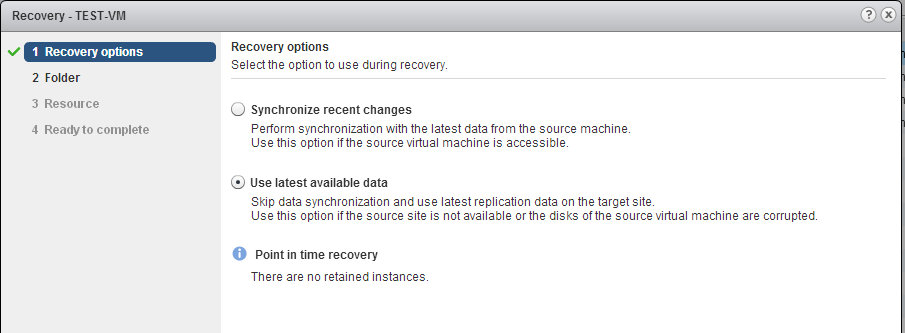 Then we will select where to recover the virtual machine. We will select the datacenter, then the host which is going to run the virtual machine. The recovery is then ready to start; you can choose to Power on the virtual machine after recovery if you wish so, then click Finish.
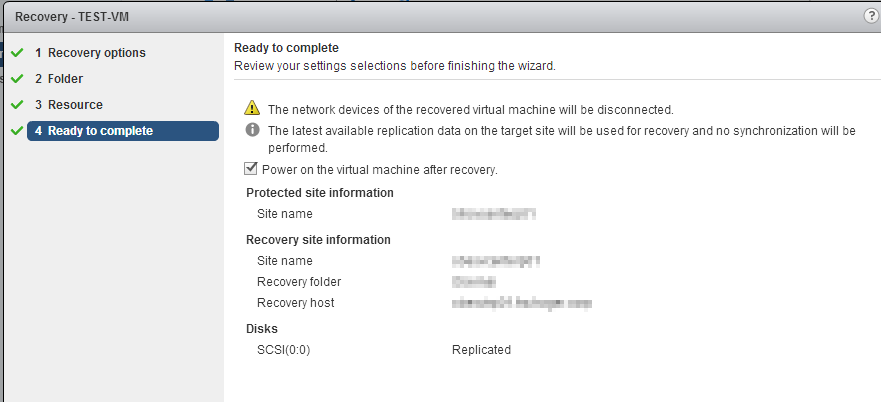 The recovery is a matter of seconds, as all the VM files are already present on the disks. The recovered VM is registered and starts on the selected host.
There is no risk to test such a recovery in production, as the recovered VM will always start with the network interface disconnected. If you wish to test extensively, you will need to connect the VM to the network and test the hosted application, but that’s beyond the scope of this article.
OK, so we have now recovered a replicated virtual machine. The test is successful. How to efficiently restart the replication?
Back to normal (restart replication from seed)
When you do a recovery, vSphere Replication stops to replicate the virtual machine. Even after the recovered VM has been shut down, the replication remains stopped. It must be reconfigured!
The easiest way to do it is to remove the recovered VM from the datastore and reconfigure a new replication from scratch. But this would not be very efficient, as we would transfer the complete VM over the network again.
There is a better option, where we will use the files of the recovered virtual machine as a seed for the new replication. This will greatly reduce the amount of network traffic needed to replicate the virtual machine again. Let’s try that!
We will start immediately after our recovery test: shut down the recovered virtual machine (Right-click, Shut Down Guest OS), then remove it from the inventory (Right-click, All vCenter Actions, Remove from Inventory). Don’t remove it from disk, or there won’t be any files left to speed up the initial replication 🙂 !
Now head back to the vCenter Server on the production site. Go to vSphere Replication, Monitor, Outgoing Replications. You can see the recovered VM… in the Recovered status! There aren’t many other possibilities than right-click this VM and select Stop.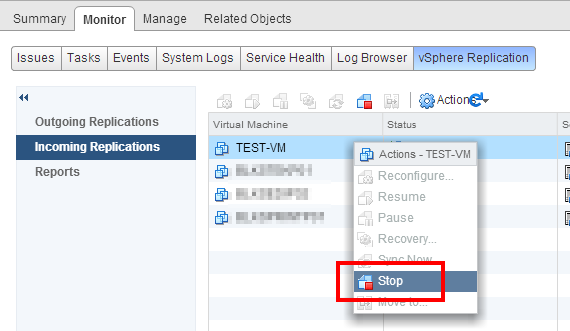 Answer OK to the next message. Your two sites should be connected and the replication will be stopped cleanly on both sites.
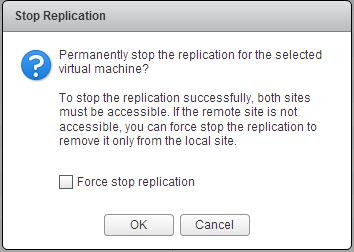 The virtual machine then disappears from the list of replicated VMs. You can check on the disaster recovery site, in Incoming Replications, that the VM has been removed there too.
There isn’t any replication left, but we still have the files of the virtual machine in the destination datastore! In order to use these files as replication seeds, we will now create a new replication and select them as seeds during the wizard.
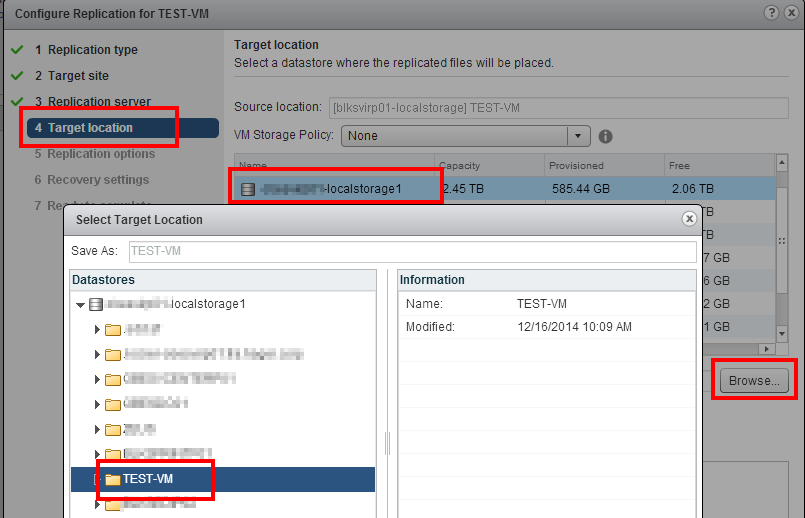
As for a normal replication, we start from the virtual machine, Right-click, All vSphere Replication actions, Configure the replication. Follow the same steps than in the previous part until the fourth step, Target location.
In this step, we will select the same datastore as for the first time we replicated this VM, then click on Browse… to explicitly select the folder where we find the existing virtual machine files. When you found the folder, select it and click OK.
 The wizard will then ask you if you wish to use these files as a replication seed. That’s exactly what we want!
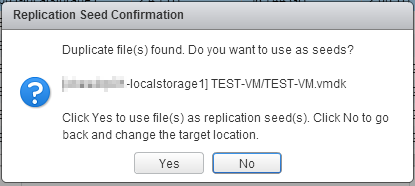 You can now go through the wizard as usual, and finish. If you monitor the replication, you will see that the initial replication is much faster and that almost no data is sent over the network.
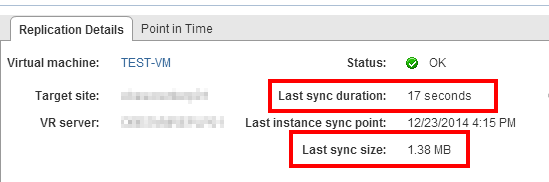 This seeding technique can also be used if you want to replicate a huge virtual machine across sites: clone the VM to an external drive that you will ship to the target location, then copy it to the destination datastore. Next, configure the replication and target to the seed files to limit the bandwidth requirements of the initial replication.
Conclusion
In our vSphere Replication articles, we have seen how to deploy and configure vSphere Replication, how to set up new replications and test them, and finally then we learned how to use seeds to optimize the initial replication.
We have also seen several vSphere Replication architectures, which demonstrate the scalability of the product and it’s ability to be deployed in many different environments, to cover use cases from a single virtual machine recovery to a complete site disaster recovery. Not bad for a free tool! (vSphere Replication is included in almost all vSphere editions).
However, in bigger environments, the limitations of vSphere Replication will start to show up: no automation, no recovery customization (for instance, you can’t automatically update the IP addresses during the recovery), no integrated failback (you have to reconfigure a replication manually), no LUN replication… If you need these features, then SRM (Site Recovery Manager) is for you… But the price isn’t the same!